
Here we are at Part 4, upgrading an ESX host from 3.5 to vSphere using the Host Upgrade Utility. I believe this is a good topic for post #100!
So, let’s get started!
To upgrade an ESX host from 3.5 to vSphere:
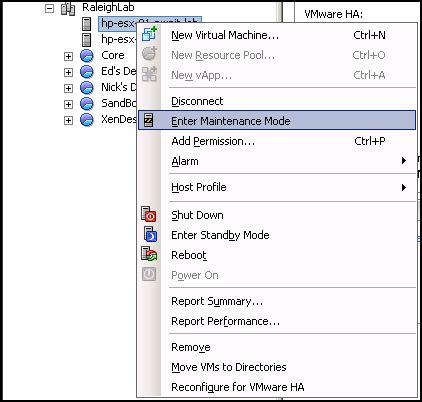
1. Launch vCenter, open the Hosts and Clusters view, and put the ESX server you are going to upgrade into Maintenance Mode. If the host is not in Maintenance Mode, the upgrade will terminate, telling you the host must be in MM for the upgrade to proceed.
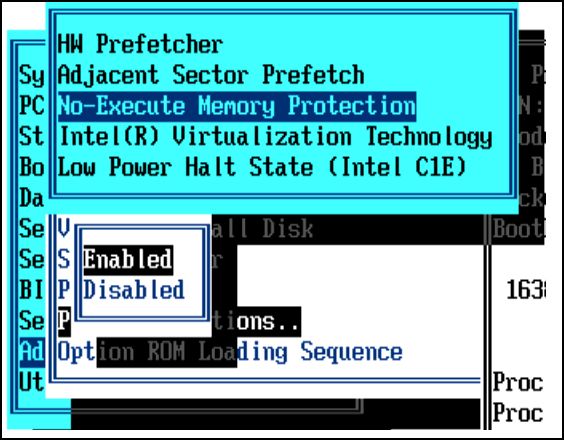
2. With the host in Maintenance Mode, reboot the ESX server and make sure the necessary BIOS settings are enabled. In this case, I needed to make sure No-Execute Memory Protection and Intel(R) Virtualization Technology options were enabled.
3. On the vCenter server, click Start | All Programs | VMware | vSphere Host Update Utility 4.0
4. When the vSphere Host Update Utility (vHUU) launches for the first time, you’ll be prompted to download patches from the VMware patch repository.
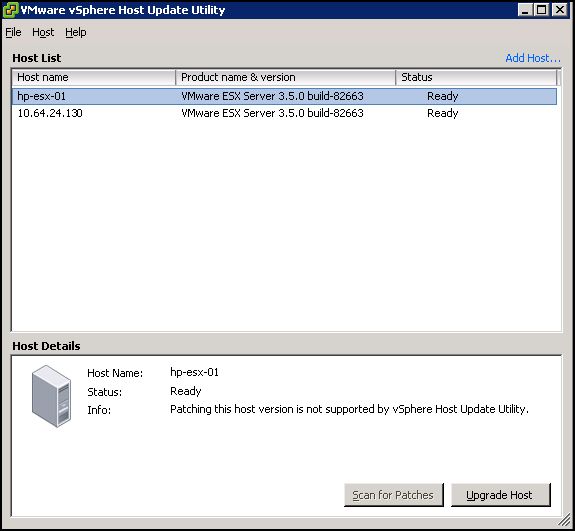
5. On the Host List window, select the ESX Host you wish to upgrade and click Upgrade Host.
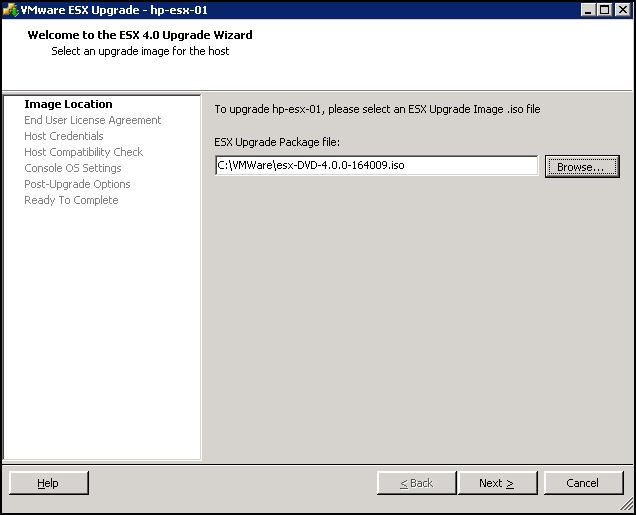
6. On the Image Location screen, click Browse and specify the location/folder containing the vSphere installation ISO. Click Next to continue.
7. Accept the license agreement and click Next.
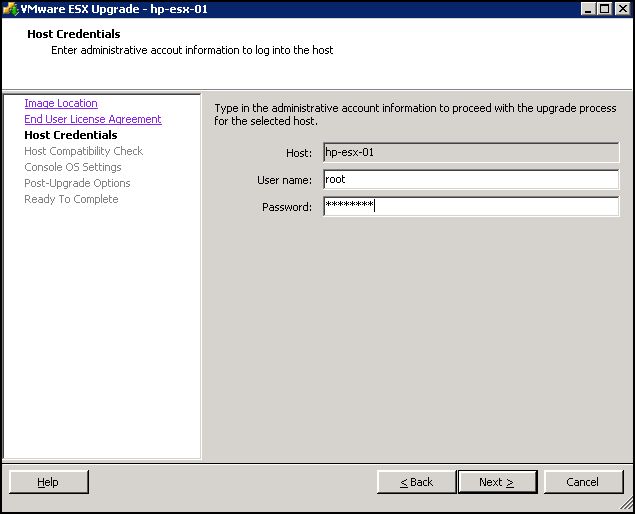
8. On the Host Credentials window, specify an account with administrative access to the ESX server and click Next.
9. Next a Host Compatibility Check is run, click Next when you see “The host is compatible with this upgrade”
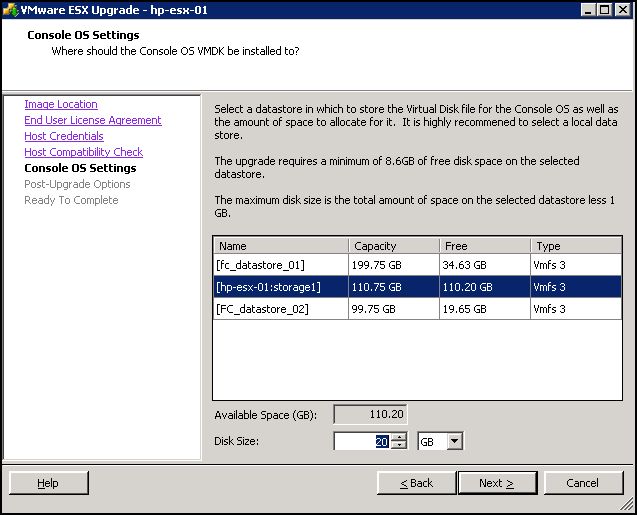
10. On the Console OS Settings window, specify the datastore to store the Service Console VMDK. The service console VMDK requires at least 8.4GB of available space and VMware recommends that you select a local datastore on the ESX host. I’ll probably expand on the Service Console VMDK in another post….
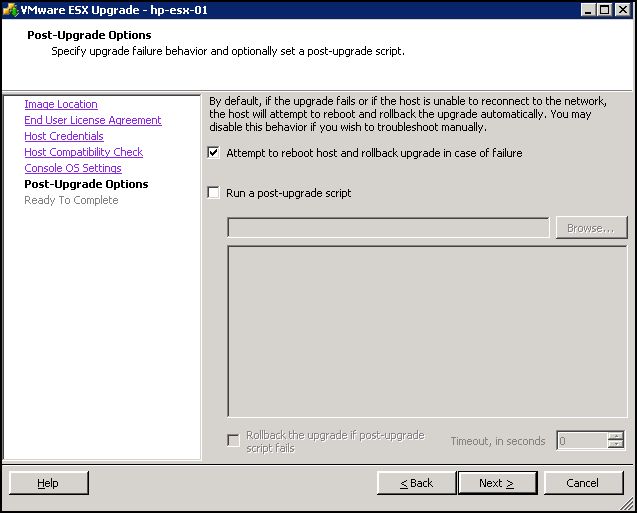
11. On the Post-Upgrade Options window, specify how you would like the upgrade wizard to handle any failed upgrade attempts and a post-install script should you desire. Click Next to continue.
12. Click Finish on the Ready to Complete screen to being the upgrade.
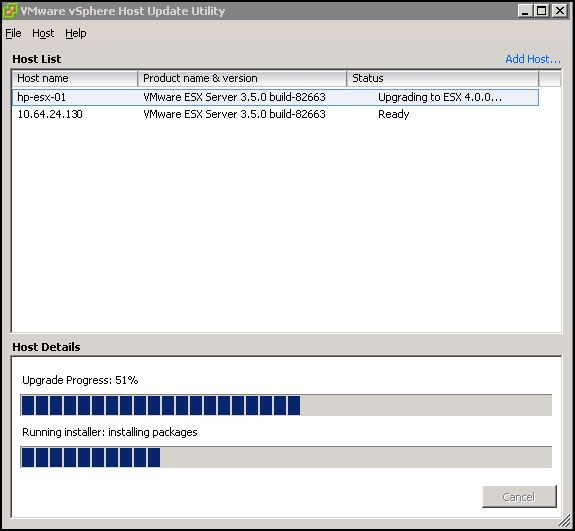
13. Within the vHUU, you can easily determine the status of the upgrade as shown below:
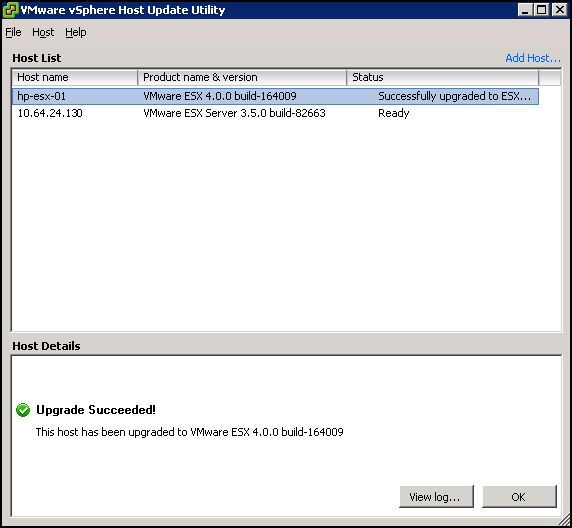
14. When the upgrade successfully completes, the vHUU will display as shown below. Click OK.
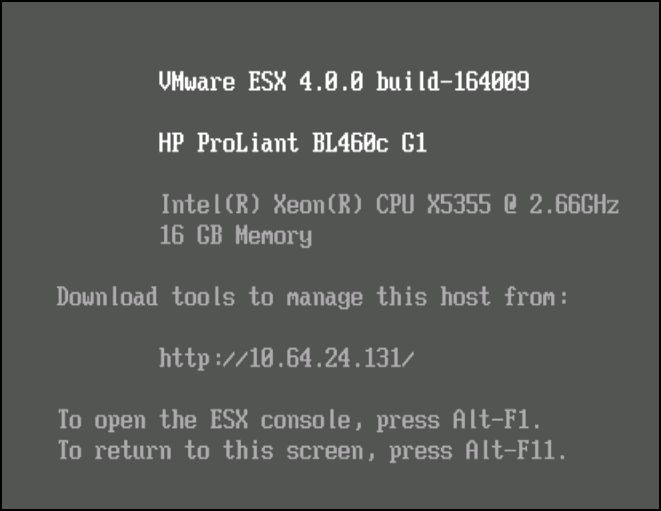
15. If you look at the server console, it should display that it is running ESX 4.0.0 build-164009. At this point, launch vCenter, right-click the upgraded ESX host, and Exit Maintenance Mode. Repeat the process to upgrade remaining ESX hosts.

Excellent post!, It was in a lot of useful I´m Going to test it tomorow!! :D!! ¿Can I publish a Spanish Mini-versión on my blog??
Hey Carnage, I'm glad you found the information useful and please feel free to publish a Spanish mini-version on your blog.
Hey thanks for the post, I am about to upgrade my production 3.5 U4 ESX boxes to 4.0 tomorrow and wanted to read some other people's experiences. I am planning on using Update Manager though, so we will see how it goes.
I make the upgrade process yesterday and all goes OK, the time-consuming part for me was migrate all my production VM's between Host´s jeje, a, and I need to reconfigure the Resource Pools, but all Ok! Thanks!!
Really good one. explaining step by step. am going test ASAP. thanks a lot.
one small request, please share the information if you faced any known issue or unknown during upgrading the host