
XenServer supports 3 types of templates (basic, full, and custom) which help you quickly deploy new VMs.
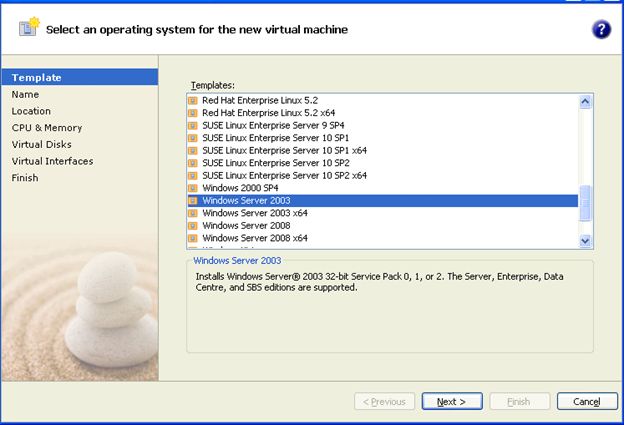
The Basic templates represent the majority of the templates available by default in any XenServer environment. These templates incorporate the recommended settings for a VM given a particular OS. An OS must be loaded on top of a basic template. A portion of the basic template available within XenServer are shown below:
Full templates include basic VM configuration settings and the OS. XenServer ships with 2 full templates for Debian Etch 4.0 and Debian Sarge 3.1
Custom templates are those VMs that are built and configured with specific specifications and are then converted to templates to be used as the source template for new VMs.
We’re going to focus on creeating and deploying VMs from custom templates.
At a very high level, the process for creating and deploying a new VM from a custom template is as follows:
1.Build a new VM from a basic template
2.Customize the VM, ie, install services, load updates, etc.
3.Run SYSPrep to prepare the VM for cloning as XenServer does not provide a “Customization Specifications” found in VMware ESX
4.Once shutdown, convert the VM into a template
5.Launch the New VM Wizard, and select the custom template as the source
6.Boot the VM, run through the Windows Mini-Setup wizard, and then run any post image process to prepare the VM for production.
I’m going to assume that our new Xen VM has been SYSPrepped and is now shutdown. We’ll pick up the steps with converting the VM into a template. We’ll then deploy a new VM using the new custom template.
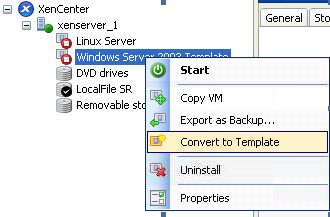
1. Within XenCenter, right-click Windows Server 2003 Template and select Convert to Template.
2. You will get a message stating that converting a VM into a template is a one-way operation. Templates are read-only and can no longer be started as a new VM.

Depending on your point of view, this can either be a good or bad thing. It can be good in that, being read-only, the template can never be “messed up”. It can be bad for the same reason, being read-only, the template can never be updated.
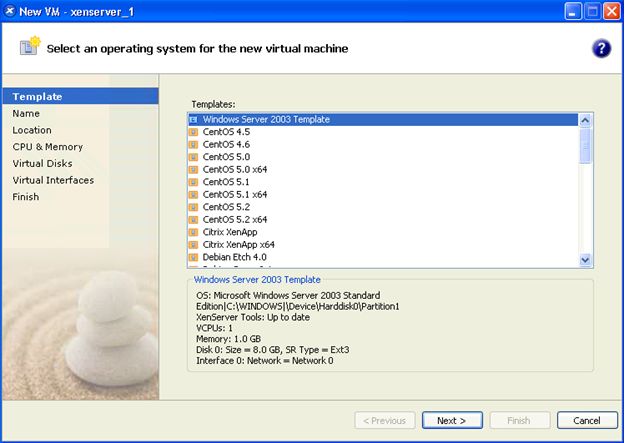
3. Next, start the New VM wizard.
4. When prompted to select an operating system, select the new custom template and click Next.
5. Enter a name and description for the new VM
6. On the Installation Media screen, select Empty DVD Drive and click Next.
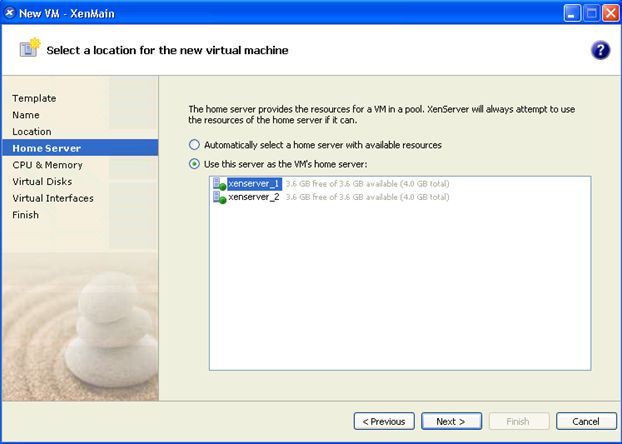
7. If you have multiple XenServers exist, you are prompted to specify which one will initially host the new VM. XenMotion can be used to migrate VMs between XenServer hosts.
8. On the CPU and Memory screen, change the vCPU and Memory if necessary.
9. On the Virtual Disks screen, the virtual disk for the new VM defaults to the storage repository which houses the custom template.
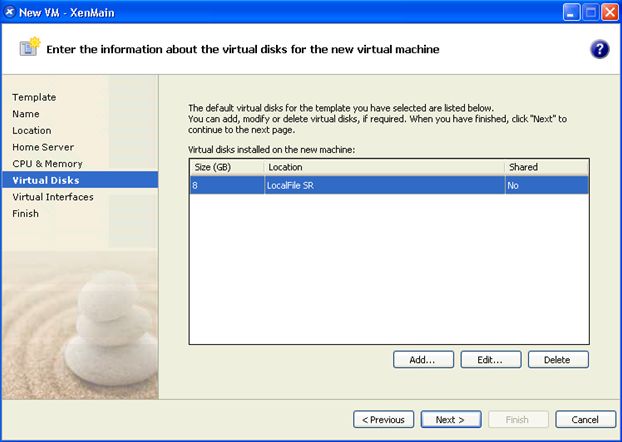
With XenServer5, you can change the storage repository for the virtual disk by clicking Edit and choosing the storage repository of your choosing.
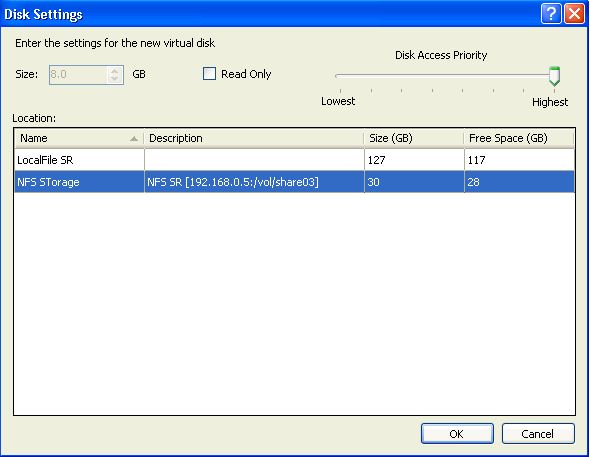
When you have the preferred storage repository set for the virtual disk, click Next to continue the new VM wizard.
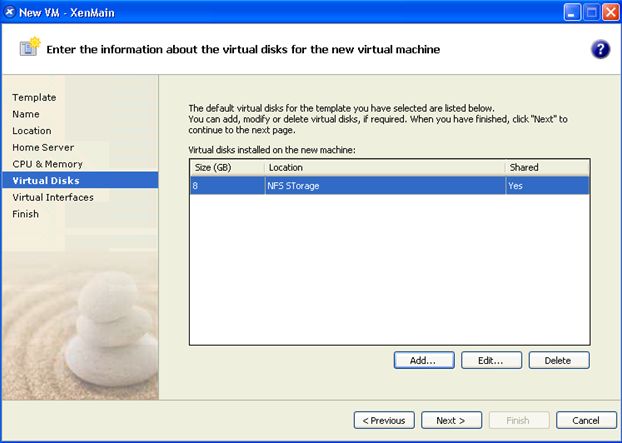
10. On the Virtual Interfaces screen, add, delete, or modify any virtual interfaces as required and click Next.
11. Click Finish to complete the New VM wizard. Highlight either your Xen Resource Group or XenServer and click the Logs tab to view the status.

12. When the new VM boots, complete the Windows mini-setup wizard and prepare the VM for production use.
Finally, I read an interesting blog entry on XenServer 4.x and custom templates which can be found here:
When in Xen, Don’t Use Custom Templates
It basically states the “Copy VM” process is a better way to deploy new VMs in XenServer 4.x and gives reasons why.
