
Here we go with what I see may be another multi-part series, this one on XenServer. Along with Windows Server 2008, I may be turning into the blogging equivalent of Law and Order but I’ll try to control myself….
Introduced in September 2008, XenServer5 has 4 editions and provides several enhancements in regards to:
-New VM Guest Support
-High Availability
-Disaster Recovery
-Virtual Networking
-Storage Management
-VM Performance
-XenSearch
-XenConvert
-Menu-Driven Text Console
More information on the features can be found on a previous post here.
The XenServer feature matrix is shown below:

Installing XenServer5
1. Insert the XenServer5 CD and boot the server. (XenServer5 can also be installed from an HTTP or FTP site)
2. When the Welcome to XenServer Setup screen appears, accept the default option Install or upgrade XenServer Host and choose Ok.

3. A warning that data will be overwritten is displayed. Choose OK.
4. The XenServer End User License Agreement (EULA) appears. Accept the license agreement to continue the installation.
5. On the Installation Type screen, choose Perform clean installation and then OK.
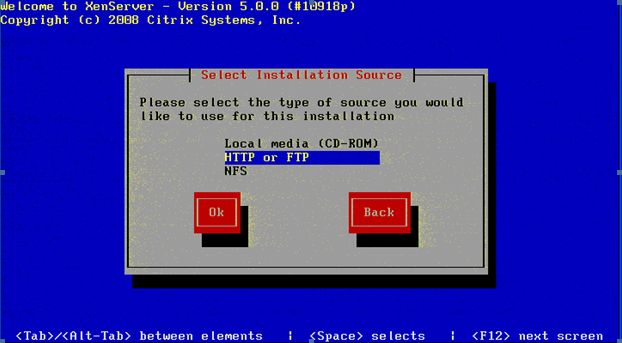
6. Select the desired installation source and choose OK.
7. Assuming the media is good, accept the default option Skip verification and choose Ok.
8. The Set Password screen appears, prompting for the root password. Enter and confirm a password for the root account and choose OK.
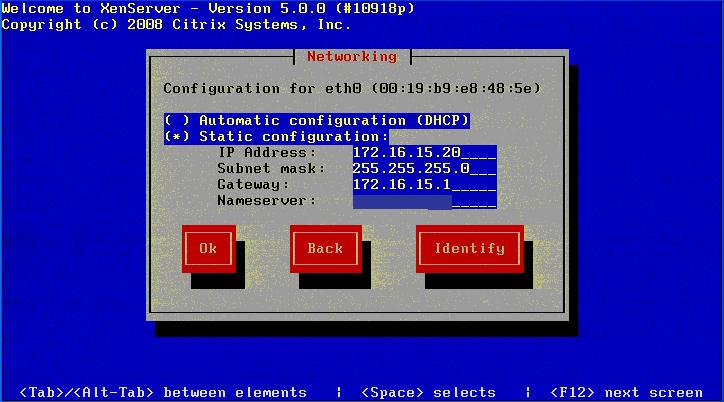
9. The Networking for management interface adapter screen appears next, select network interface eth0 and choose Ok. Enter the desired IP information and choose OK.
10. Next, the Hostname and DNS Configurationscreen appears. Specify the hostname and DNS servers to use and choose Ok.

11. The next tasks are to select the time zone and nearest city/area. Select the appropriate settings for your area and choose OK.
12. Next, you are given the opportunity to specify an NTP time server. Select Using NTP and choose Ok. When the NTP Configuration screen appears enter your preferred NTP server and choose OK.
13. On the Confirm Installation screen, choose Install XenServer.

14. A progress bar displays as installation commences. A completion message displays when installation finishes. Choose Ok when the Installation Complete screen appears to reboot the system and finalize the installation.

In part 2 of the series, we’ll cover installing XenCenter and adding our XenServer host to it.
