
1. To enable pass-through authentication XenApp Services URLs hosted on StoreFront Servers.
From CTX eDocs:
XenApp Services URLs enable users of domain-joined desktop appliances and repurposed PCs running the Citrix Desktop Lock, along with users who have older Citrix clients that cannot be upgraded, to access stores. When you create a new store, the XenApp Services URL is enabled by default. The XenApp Services URL for a store has the form http[s]://serveraddress/Citrix/storename/PNAgent/config.xml, where serveraddress is the fully qualified domain name of the server or load balancing environment for your StoreFront deployment and storename is the name specified for the store when it was created.
XenApp Services URLs support explicit, domain pass-through, and pass-through with smart card authentication. Explicit authentication is enabled by default. You can change the authentication method, but only one authentication method can be configured for each XenApp Services URL. To enable multiple authentication methods, create separate stores, each with a XenApp Services URL, for each authentication method. To change the authentication method for a XenApp Services URL, you run a Windows PowerShell script.
To set the authentication method to domain pass-through, perform the following PowerShell command on your StoreFront server:
1. set-executionpolicy unrestricted (may or may not be necessary)
2. change directories to C:\Program Files\Citrix\Receiver StoreFront\scripts
3. type: .\EnablePnaForStore.ps1 -SiteId 1 -ResourcesVirtualPath /Citrix/Store -LogonMethod sson and press
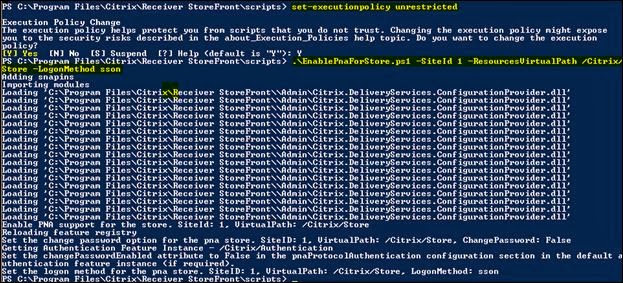
**In this example, I had a single IIS WebSite created on my StoreFront server. If you have multiple web sites on an IIS server hosting the StoreFront site, your SiteId could be different.
To change back to the explicit authentication method, execute the command again but change the LogonMethod to prompt. Additionally, if you have multiple StoreFront servers, be sure to either update them all OR use the StoreFront console to propagate the changes to all SF servers within a server group.
2. Enable Recycle Bin access after VDA has been installed
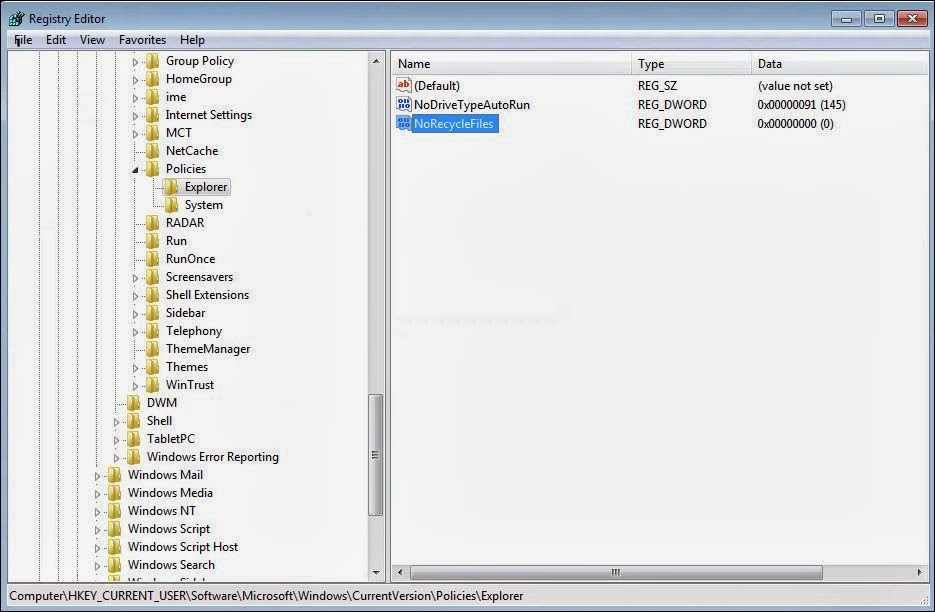
If you use the Citrix VDA to optimize your golden image/VM, a registry key is added that disables user access to the Recycle Bin. To re-enable access to the Recycle Bin, change the following registry key:
HKCU\Software\Microsoft\Windows\CurrentVersion\Policies\Explorer
Set the value of NoRecycleFiles to 0
I had read that making this change would allow users to have access to the Recycle Bin ONLY during their active session but I think that depends on the connection/desktop type. For example, the virtual desktop in this example was a dedicated/static/persistent desktop and once I changed the value to 0, access to the Recycle Bin and any of its contents persisted after reboots. It may work differently for non-persistent desktops that are streamed from Provisioning Servers, especially since the value is stored in the user specific HKCU.
Prior to roll out, I use User Profile Manager from ForensIT (www.forensit.com) to copy my VDI template profile to the default user so that the setting is persistent on the virtual desktop.

Once i configure this , what do i expect when i open IE and lauch https://mystorefront.domain.com
Does it automatically log me in. Or still ask for username and password.
Also after running this command , does something change in config.aspx file at C:\inetpub\wwwroot\Citrix\DOHStoreFront\Views\PnaConfig